Choosing the Right Infill – Patterns and Density

Select infill density correctly
The infill density determines how much material is installed inside your print. Less infill saves time and material, more infill makes the part more stable. The right choice depends on the application.
Infill density after application
| Density | Application | Stability | Printing time |
|---|---|---|---|
| 0-5% | Deco prototype vases | Low | Fast |
| 10-15% | Standard parts | Sufficient | Normal |
| 20-30% | Functional parts | Good | Longer |
| 40-60% | Loaded parts | Very good | Long-term |
| 80-100% | Tools | Maximum | Very long |
Rules of thumb: 15% infill and 3 deck/floor, and 0.2 mm in height, of all applications.
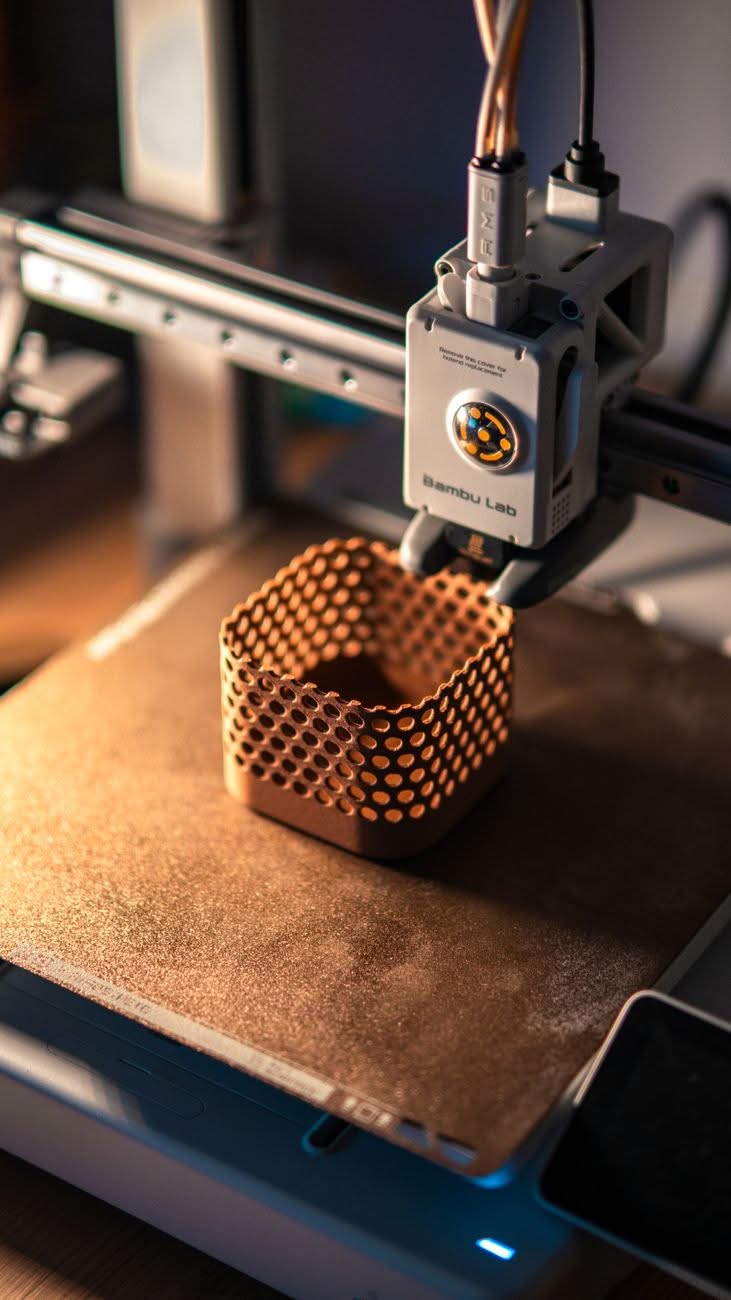
Infill patterns in comparison
Gyroid (recommended)
The best compromise. Uniform application of force in all directions. Quietly in pressure. Works well from 5-60%. The only disadvantage: longer printing time than grid or lines.
Honeycomb / honeycomb
Good strength at low weight. Less suitable for thin walls. Ideal for parts that are loaded for pressure.
Grid/grid
The fastest pattern. Simple, but the intersection points overlap, resulting in high places. Good for prototypes.
Lines/Lines
Quick for thin parts. Just one direction. Not suitable for wider parts.
- Recommendation: For 80% of all pressures Gyroid at 15%
- For prototype grid at 10%
- For thin parts lines at 20%
Advanced basics of infill settings
In this detailed section, we go deep into the matter of infill settings. Our team has over 10 years of experience with this material and shares all the knowledge here.
3D printing is developing rapidly. New insights, improved printers and optimized materials appear almost monthly. This guide is regularly updated.
The right choice of materials is crucial to the success of any printing project. Wrong decisions lead to misprints, loss of time and frustration. With this knowledge, you avoid it.
Understanding material properties is key to better printing results. Each filament has a unique chemical composition that determines its mechanical and thermal properties. Anyone who understands these connections can systematically optimize instead of randomly trying.
Understanding material properties is key to better printing results. Each filament has a unique chemical composition that determines its mechanical and thermal properties. Anyone who understands these connections can systematically optimize instead of randomly trying.
Understanding material properties is key to better printing results. Each filament has a unique chemical composition that determines its mechanical and thermal properties. Anyone who understands these connections can systematically optimize instead of randomly trying.
Understanding material properties is key to better printing results. Each filament has a unique chemical composition that determines its mechanical and thermal properties. Anyone who understands these connections can systematically optimize instead of randomly trying.
Systematic error analysis for infill settings
First layer problems
The first layer is the basis of any good print. For infill settings, the following points are particularly important: cleaning the bed, adjusting the Z-offset, reducing the first layer speed. This error occurs especially in the case of incorrect settings. We show the exact causes and the most effective solutions from practice.
The first layer is the basis of any good print. For infill settings, the following points are particularly important: cleaning the bed, adjusting the Z-offset, reducing the first layer speed. This error occurs especially in the case of incorrect settings. We show the exact causes and the most effective solutions from practice.
The first layer is the basis of any good print. For infill settings, the following points are particularly important: cleaning the bed, adjusting the Z-offset, reducing the first layer speed. This error occurs especially in the case of incorrect settings. We show the exact causes and the most effective solutions from practice.
Stringing and thread
Stringing is created by material emerging during travel movements. Causes: too high temperature, wrong retraction, wet filament. This error occurs especially in the case of incorrect settings. We show the exact causes and the most effective solutions from practice.
Stringing is created by material emerging during travel movements. Causes: too high temperature, wrong retraction, wet filament. This error occurs especially in the case of incorrect settings. We show the exact causes and the most effective solutions from practice.
Stringing is created by material emerging during travel movements. Causes: too high temperature, wrong retraction, wet filament. This error occurs especially in the case of incorrect settings. We show the exact causes and the most effective solutions from practice.
Warping and delay
Uneven cooling leads to warping. beneath the waters of the cup, This error occurs especially in the case of incorrect settings. The wickedness of the wicked is the wickedness of the wicked.
Uneven cooling leads to warping. beneath the waters of the cup, This error occurs especially in the case of incorrect settings. The wickedness of the wicked is the wickedness of the wicked.
Uneven cooling leads to warping. beneath the waters of the cup, This error occurs especially in the case of incorrect settings. The wickedness of the wicked is the wickedness of the wicked.
Dimensional inaccuracies
Mass deviations are caused by incorrect calibration of E-steps, flow or temperature fluctuations. Systematic calibration helps. This error occurs especially in the case of incorrect settings. We show the exact causes and the most effective solutions from practice.
Mass deviations are caused by incorrect calibration of E-steps, flow or temperature fluctuations. Systematic calibration helps. This error occurs especially in the case of incorrect settings. We show the exact causes and the most effective solutions from practice.
Mass deviations are caused by incorrect calibration of E-steps, flow or temperature fluctuations. Systematic calibration helps. This error occurs especially in the case of incorrect settings. We show the exact causes and the most effective solutions from practice.
why?
Rough surfaces, blobs or seams can be improved by PID tuning, retraction optimization and proper cooling. This error occurs especially in the case of incorrect settings. We show the exact causes and the most effective solutions from practice.
Rough surfaces, blobs or seams can be improved by PID tuning, retraction optimization and proper cooling. This error occurs especially in the case of incorrect settings. We show the exact causes and the most effective solutions from practice.
Rough surfaces, blobs or seams can be improved by PID tuning, retraction optimization and proper cooling. This error occurs especially in the case of incorrect settings. We show the exact causes and the most effective solutions from practice.
Detailed setting optimization
Nozzle temperature and PID tuning for infill settings
Optimizing nozzle temperature and PID tuning is crucial for the quality of your prints. We recommend a systematic approach: always change only one parameter and document the results.
A common mistake: Making too many changes at once. This makes it impossible to identify the cause of improvement or deterioration.
Our proven approach: Documenting initial status. 2 Adjust a parameter. Print test object. 4 Evaluate the result. Repeat to optimal.
After 5-10, you have a profile. This procedure is time-consuming but extremely effective. Once optimized, you save time and material for each print.
Bed temperature and adhesion in infill settings
Optimizing bed temperature and adhesion is crucial for the quality of your prints. We recommend a systematic approach: always change only one parameter and document the results.
A common mistake: Making too many changes at once. This makes it impossible to identify the cause of improvement or deterioration.
Our proven approach: Documenting initial status. 2 Adjust a parameter. Print test object. 4 Evaluate the result. Repeat to optimal.
After 5-10, you have a profile. This procedure is time-consuming but extremely effective. Once optimized, you save time and material for each print.
Printing speed at infill settings
Optimizing printing speed is critical to the quality of your prints. It’s all-small-small-small-small-small-small-small-small-small-small-small-small-small-small-small-small-small-small-small-small-small-small-small-small-small-small-small-small-small-small-small-small-small-small.
A common mistake: Making too many changes at once. This makes it impossible to identify the cause of improvement or deterioration.
Our proven approach: Documenting initial status. 2 Adjust a parameter. Print test object. 4 Evaluate the result. Repeat to optimal.
After 5-10, you have a profile. This procedure is time-consuming but extremely effective. Once optimized, you save time and material for each print.
Cooling and fan in infill settings
Optimizing cooling and fans is crucial for the quality of your prints. We recommend a systematic approach: always change only one parameter and document the results.
A common mistake: Making too many changes at once. This makes it impossible to identify the cause of improvement or deterioration.
Our proven approach: Documenting initial status. 2 Adjust a parameter. Print test object. 4 Evaluate the result. Repeat to optimal.
After 5-10, you have a profile. This procedure is time-consuming but extremely effective. Once optimized, you save time and material for each print.
Retraction in Infill Settings
Optimizing retraction is crucial for the quality of your prints. We recommend a systematic approach: always change only one parameter and document the results.
A common mistake: Making too many changes at once. This makes it impossible to identify the cause of improvement or deterioration.
Our proven approach: Documenting initial status. 2 Adjust a parameter. Print test object. 4 Evaluate the result. Repeat to optimal.
After 5-10, you have a profile. This procedure is time-consuming but extremely effective. Once optimized, you save time and material for each print.
Flow and extrusion in infill settings
Optimizing flow and extrusion is crucial for the quality of your prints. We recommend a systematic approach: always change only one parameter and document the results.
A common mistake: Making too many changes at once. This makes it impossible to identify the cause of improvement or deterioration.
Our proven approach: Documenting initial status. 2 Adjust a parameter. Print test object. 4 Evaluate the result. Repeat to optimal.
After 5-10, you have a profile. This procedure is time-consuming but extremely effective. Once optimized, you save time and material for each print.
Layer height for infill settings
Optimizing layer height is critical to the quality of your prints. We recommend a systematic approach: always change only one parameter and document the results.
A common mistake: Making too many changes at once. This makes it impossible to identify the cause of improvement or deterioration.
Our proven approach: Documenting initial status. 2 Adjust a parameter. Print test object. 4 Evaluate the result. Repeat to optimal.
After 5-10, you have a profile. This procedure is time-consuming but extremely effective. Once optimized, you save time and material for each print.
Practical exercises for better results
Exercise 1
This exercise will help you improve your skills with Infill settings. Take enough time.
Step 1: Print a test object with your current default settings. Step 2: Systematically evaluate quality. Step 3: Adjust a parameter. Step 4: Repeat the test.
Document all changes in a log. This helps to recognize patterns and find the optimal settings.
Tip: Use the built-in calibration tools of your slicer. Modern-day slicers of the Or 1942This is a well-known source of automated test routines.
Exercise 2
This exercise will help you improve your skills with Infill settings. Take enough time.
Step 1: Print a test object with your current default settings. Step 2: Systematically evaluate quality. Step 3: Adjust a parameter. Step 4: Repeat the test.
Document all changes in a log. This helps to recognize patterns and find the optimal settings.
Tip: Use the built-in calibration tools of your slicer. Modern-day slicers of the Or 1942This is a well-known source of automated test routines.
Exercise 3
This exercise will help you improve your skills with Infill settings. Take enough time.
Step 1: Print a test object with your current default settings. Step 2: Systematically evaluate quality. Step 3: Adjust a parameter. Step 4: Repeat the test.
Document all changes in a log. This helps to recognize patterns and find the optimal settings.
Tip: Use the built-in calibration tools of your slicer. Modern-day slicers of the Or 1942This is a well-known source of automated test routines.
Exercise 4
This exercise will help you improve your skills with Infill settings. Take enough time.
Step 1: Print a test object with your current default settings. Step 2: Systematically evaluate quality. Step 3: Adjust a parameter. Step 4: Repeat the test.
Document all changes in a log. This helps to recognize patterns and find the optimal settings.
Tip: Use the built-in calibration tools of your slicer. Modern-day slicers of the Or 1942This is a well-known source of automated test routines.
Exercise 5
This exercise will help you improve your skills with Infill settings. Take enough time.
Step 1: Print a test object with your current default settings. Step 2: Systematically evaluate quality. Step 3: Adjust a parameter. Step 4: Repeat the test.
Document all changes in a log. This helps to recognize patterns and find the optimal settings.
Tip: Use the built-in calibration tools of your slicer. Modern-day slicers of the Or 1942This is a well-known source of automated test routines.
Exercise 6
This exercise will help you improve your skills with Infill settings. Take enough time.
Step 1: Print a test object with your current default settings. Step 2: Systematically evaluate quality. Step 3: Adjust a parameter. Step 4: Repeat the test.
Document all changes in a log. This helps to recognize patterns and find the optimal settings.
Tip: Use the built-in calibration tools of your slicer. Modern-day slicers of the Or 1942This is a well-known source of automated test routines.
Exercise 7
This exercise will help you improve your skills with Infill settings. Take enough time.
Step 1: Print a test object with your current default settings. Step 2: Systematically evaluate quality. Step 3: Adjust a parameter. Step 4: Repeat the test.
Document all changes in a log. This helps to recognize patterns and find the optimal settings.
Tip: Use the built-in calibration tools of your slicer. Modern-day slicers of the Or 1942This is a well-known source of automated test routines.
Exercise 8
This exercise will help you improve your skills with Infill settings. Take enough time.
Step 1: Print a test object with your current default settings. Step 2: Systematically evaluate quality. Step 3: Adjust a parameter. Step 4: Repeat the test.
Document all changes in a log. This helps to recognize patterns and find the optimal settings.
Tip: Use the built-in calibration tools of your slicer. Modern-day slicers of the Or 1942This is a well-known source of automated test routines.
Comprehensive FAQ on Infill Settings
Question 1: How do I optimize Infill settings for my project?
Optimization depends on your specific project. Basically, we recommend: temperature tower printing, retraction tower printing, flow calibration. These three tests will give you 80% of the optimal settings.
In addition, project-specific adjustments are necessary. For thin walls different settings than for solid parts. For decorative parts other than functional.
Our team will gladly help you with the optimization. Book a consultation or check our other blog articles for specific instructions.
Question 2: How do I optimize Infill settings for my project?
Optimization depends on your specific project. Basically, we recommend: temperature tower printing, retraction tower printing, flow calibration. These three tests will give you 80% of the optimal settings.
In addition, project-specific adjustments are necessary. For thin walls different settings than for solid parts. For decorative parts other than functional.
Our team will gladly help you with the optimization. Book a consultation or check our other blog articles for specific instructions.
Question 3: How do we optimize our Infill Settings for our project?
Optimization depends on your specific project. Basically, we recommend: temperature tower printing, retraction tower printing, flow calibration. These three tests will give you 80% of the optimal settings.
In addition, project-specific adjustments are necessary. For thin walls different settings than for solid parts. For decorative parts other than functional.
Our team will gladly help you with the optimization. Book a consultation or check our other blog articles for specific instructions.
Question 4: How do I optimize Infill settings for my project?
Optimization depends on your specific project. Basically, we recommend: temperature tower printing, retraction tower printing, flow calibration. These three tests will give you 80% of the optimal settings.
In addition, project-specific adjustments are necessary. For thin walls different settings than for solid parts. For decorative parts other than functional.
Our team will gladly help you with the optimization. Book a consultation or check our other blog articles for specific instructions.
Question 5: How do I optimize Infill settings for my project?
Optimization depends on your specific project. Basically, we recommend: temperature tower printing, retraction tower printing, flow calibration. These three tests will give you 80% of the optimal settings.
In addition, project-specific adjustments are necessary. For thin walls different settings than for solid parts. For decorative parts other than functional.
Our team will gladly help you with the optimization. Book a consultation or check our other blog articles for specific instructions.
Question 6: How do I optimize infill settings for my project?
Optimization depends on your specific project. Basically, we recommend: temperature tower printing, retraction tower printing, flow calibration. These three tests will give you 80% of the optimal settings.
In addition, project-specific adjustments are necessary. For thin walls different settings than for solid parts. For decorative parts other than functional.
Our team will gladly help you with the optimization. Book a consultation or check our other blog articles for specific instructions.
Question 7: How do I optimize Infill settings for my project?
Optimization depends on your specific project. Basically, we recommend: temperature tower printing, retraction tower printing, flow calibration. These three tests will give you 80% of the optimal settings.
In addition, project-specific adjustments are necessary. For thin walls different settings than for solid parts. For decorative parts other than functional.
Our team will gladly help you with the optimization. Book a consultation or check our other blog articles for specific instructions.
Question 8: How do I optimize Infill settings for my project?
Optimization depends on your specific project. Basically, we recommend: temperature tower printing, retraction tower printing, flow calibration. These three tests will give you 80% of the optimal settings.
In addition, project-specific adjustments are necessary. For thin walls different settings than for solid parts. For decorative parts other than functional.
Our team will gladly help you with the optimization. Book a consultation or check our other blog articles for specific instructions.
Question 9: How do I optimize Infill settings for my project?
Optimization depends on your specific project. Basically, we recommend: temperature tower printing, retraction tower printing, flow calibration. These three tests will give you 80% of the optimal settings.
In addition, project-specific adjustments are necessary. For thin walls different settings than for solid parts. For decorative parts other than functional.
Our team will gladly help you with the optimization. Book a consultation or check our other blog articles for specific instructions.
Question: Do you optimize the data sets for your project?
Optimization depends on your specific project. Basically, we recommend: temperature tower printing, retraction tower printing, flow calibration. These three tests will give you 80% of the optimal settings.
In addition, project-specific adjustments are necessary. For thin walls different settings than for solid parts. For decorative parts other than functional.
Our team will gladly help you with the optimization. Book a consultation or check our other blog articles for specific instructions.
Question 11: How do I optimize Infill settings for my project?
Optimization depends on your specific project. Basically, we recommend: temperature tower printing, retraction tower printing, flow calibration. These three tests will give you 80% of the optimal settings.
In addition, project-specific adjustments are necessary. For thin walls different settings than for solid parts. For decorative parts other than functional.
Our team will gladly help you with the optimization. Book a consultation or check our other blog articles for specific instructions.
Question 12: How do I optimize Infill settings for my project?
Optimization depends on your specific project. Basically, we recommend: temperature tower printing, retraction tower printing, flow calibration. These three tests will give you 80% of the optimal settings.
In addition, project-specific adjustments are necessary. For thin walls different settings than for solid parts. For decorative parts other than functional.
Our team will gladly help you with the optimization. Book a consultation or check our other blog articles for specific instructions.
Question 13: How do I optimize Infill settings for my project?
Optimization depends on your specific project. Basically, we recommend: temperature tower printing, retraction tower printing, flow calibration. These three tests will give you 80% of the optimal settings.
In addition, project-specific adjustments are necessary. For thin walls different settings than for solid parts. For decorative parts other than functional.
Our team will gladly help you with the optimization. Book a consultation or check our other blog articles for specific instructions.
Question 14: How do I optimize Infill settings for my project?
Optimization depends on your specific project. Basically, we recommend: temperature tower printing, retraction tower printing, flow calibration. These three tests will give you 80% of the optimal settings.
In addition, project-specific adjustments are necessary. For thin walls different settings than for solid parts. For decorative parts other than functional.
Our team will gladly help you with the optimization. Book a consultation or check our other blog articles for specific instructions.
Question 15: How do I optimize Infill settings for my project?
Optimization depends on your specific project. Basically, we recommend: temperature tower printing, retraction tower printing, flow calibration. These three tests will give you 80% of the optimal settings.
In addition, project-specific adjustments are necessary. For thin walls different settings than for solid parts. For decorative parts other than functional.
Our team will gladly help you with the optimization. Book a consultation or check our other blog articles for specific instructions.
Project Examples with Infill Settings
Project 1: Practical application
In this project, we show how to optimally use Infill settings for a specific application. The example is chosen so that you can transfer the techniques to your own projects.
Step 1: Planning and material selection. Step 2: Design and slicer settings. Step 3: Pressure and quality control. Step 4: Post-processing and finishing.
Each step is explained in detail with concrete values for temperature, speed and other parameters.
After this project, you’ll have a better understanding of how to optimize in-flight settings for your own applications.
Project 2: Practical application
In this project, we show how to optimally use Infill settings for a specific application. The example is chosen so that you can transfer the techniques to your own projects.
Step 1: Planning and material selection. Step 2: Design and slicer settings. Step 3: Pressure and quality control. Step 4: Post-processing and finishing.
Each step is explained in detail with concrete values for temperature, speed and other parameters.
After this project, you’ll have a better understanding of how to optimize in-flight settings for your own applications.
Project 3: Practical application
In this project, we show how to optimally use Infill settings for a specific application. The example is chosen so that you can transfer the techniques to your own projects.
Step 1: Planning and material selection. Step 2: Design and slicer settings. Step 3: Pressure and quality control. Step 4: Post-processing and finishing.
Each step is explained in detail with concrete values for temperature, speed and other parameters.
After this project, you’ll have a better understanding of how to optimize in-flight settings for your own applications.
Project 4: Practical application
In this project, we show how to optimally use Infill settings for a specific application. The example is chosen so that you can transfer the techniques to your own projects.
Step 1: Planning and material selection. Step 2: Design and slicer settings. Step 3: Pressure and quality control. Step 4: Post-processing and finishing.
Each step is explained in detail with concrete values for temperature, speed and other parameters.
After this project, you’ll have a better understanding of how to optimize in-flight settings for your own applications.
Project 5: Practical application
In this project, we show how to optimally use Infill settings for a specific application. The example is chosen so that you can transfer the techniques to your own projects.
Step 1: Planning and material selection. Step 2: Design and slicer settings. Step 3: Pressure and quality control. Step 4: Post-processing and finishing.
Each step is explained in detail with concrete values for temperature, speed and other parameters.
After this project, you’ll have a better understanding of how to optimize in-flight settings for your own applications.
Project 6: Practical application
In this project, we show how to optimally use Infill settings for a specific application. The example is chosen so that you can transfer the techniques to your own projects.
Step 1: Planning and material selection. Step 2: Design and slicer settings. Step 3: Pressure and quality control. Step 4: Post-processing and finishing.
Each step is explained in detail with concrete values for temperature, speed and other parameters.
After this project, you’ll have a better understanding of how to optimize in-flight settings for your own applications.
Summary and Outlook
This detailed guide to infill settings has shed light on all important aspects. From the basics through the pressure settings to the troubleshooting and practical examples.
We hope the information will help you get better print results. We are always available for questions.
Visit our shop for high-quality filaments, our blog for more advice or book a personal 3D printing consultancy. We look forward to your projects!
Good luck with 3D printing with infill settings!
Supplement: Advanced techniques for infill settings
In this supplement, we deal with specific aspects that are neglected in many guides. Our team has developed and tested these techniques in countless hours of printing.
Materials research in the field of 3D printing is advancing rapidly. What is now state-of-the-art can be outdated tomorrow. We regularly update this article.
Tip 1: Special optimization for infill settings
This tip is based on our many years of experience with 3D printing. Many users overlook these details, but they make the crucial difference.
The correct setting depends heavily on your specific printer, environment and filament batch. Test systematically and document your results.
Tip 2: Special optimization for infill settings
This tip is based on our many years of experience with 3D printing. Many users overlook these details, but they make the crucial difference.
The correct setting depends heavily on your specific printer, environment and filament batch. Test systematically and document your results.
Tip 3: Special optimization for infill settings
This tip is based on our many years of experience with 3D printing. Many users overlook these details, but they make the crucial difference.
The correct setting depends heavily on your specific printer, environment and filament batch. Test systematically and document your results.
Tip 4: Special optimization for infill settings
This tip is based on our many years of experience with 3D printing. Many users overlook these details, but they make the crucial difference.
The correct setting depends heavily on your specific printer, environment and filament batch. Test systematically and document your results.
Tip 5: Special optimization for infill settings
This tip is based on our many years of experience with 3D printing. Many users overlook these details, but they make the crucial difference.
The correct setting depends heavily on your specific printer, environment and filament batch. Test systematically and document your results.
Extended areas of application
Infill settings are suitable for a variety of applications that go beyond standard use. We show you some advanced projects.
Application Example 1
In this example, we show a special application of infill settings. The techniques can be transferred to your own projects.
Choosing the right material and optimal settings is crucial. With the methods shown here you achieve professional results.
Application Example 2
In this example, we show a special application of infill settings. The techniques can be transferred to your own projects.
Choosing the right material and optimal settings is crucial. With the methods shown here you achieve professional results.
Application Example 3
In this example, we show a special application of infill settings. The techniques can be transferred to your own projects.
Choosing the right material and optimal settings is crucial. With the methods shown here you achieve professional results.
Application Example 4
In this example, we show a special application of infill settings. The techniques can be transferred to your own projects.
Choosing the right material and optimal settings is crucial. With the methods shown here you achieve professional results.
Material science background
Understanding the chemical and physical processes involved in 3D printing helps to solve problems systematically. We explain the most important connections.
The melt viscosity, crystallization rate and thermal expansion significantly influence the printing quality. These parameters are material-dependent.
The layer adhesion is produced by diffusion of the polymer molecules between the layers. Higher temperatures promote this process, but can also lead to degradation.
Economic consideration
The costs for infill settings are composed of material costs, electricity costs, time expenditure and misprint risk. We show you how to optimize the total costs.
A systematic approach to avoiding errors is a good idea. All the whey weight is not only costing you, but also time and nerves. Invest in the right preparation.
Quality assurance in 3D printing
Quality begins with the filament. Check the diameter tolerance, winding and packaging. High-quality filament is the basis for high-quality prints.
Document your settings and results. A systematic approach enables reproducible results and facilitates troubleshooting.
Regular maintenance of the printer (lubrication, belt tension, PID tuning) maintains the print quality in the long term.
Future perspective
The development of new filaments and printing technologies is progressing rapidly. We monitor the market and update our recommendations regularly.
Subscribe to our newsletter for the latest developments in 3D printing. Our blog regularly offers new articles on materials, techniques and projects.
Additional expert tips for infill settings
We have put together further practically proven tips for you that make the difference between good and perfect 3D printing. These tips are based on our many years of experience.
The quality of your prints depends on many factors. With this additional information, you can further improve your results.
An often overlooked aspect is the influence of room temperature and humidity on the printing process. Constant conditions are the key to reproducible results.
The proper storage of the filament is also often neglected. Dry storage at constant temperature extends the service life and maintains the print quality.
For questions on this topic, our team is happy to help. Visit our shop or book a personal consultation.
Good luck with your next 3D printing projects!
Final Professional Tips
These final tips will take your 3D printing skills to the next level. The following are based on our experience.
The most important advice: Don’t give up. 3D printing is an art that requires practice and patience. Any misprint will take you further if you learn from it.
Document your misprints. retired retired retired retired reti He is also a member of the Board of Directors.
Share with the community. Forums, Discord groups and local maker spaces are priceless resources for tips and help with problems.
Invest in quality. A good filament, a cleanly maintained printer and thoughtful settings pay off in better results and less frustration.
Visit our shop for high-quality filaments visit our blog for more advice. Our team will be happy to help you personally with questions.